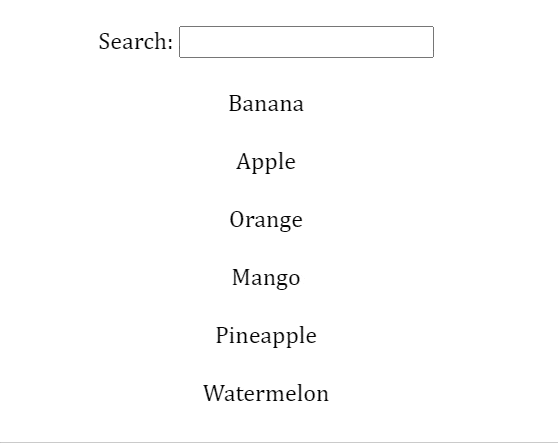
1. Build Search filter in React
React code to build a simple search filter functionality to display a filtered list based on the search query entered by the user.
The following are the steps to create a Search filter using React JS:
- Declare React states for search input values.
- Create HTML input text for entering search term and update state in onChange function.
- Add Array.filter() on list of items with search term value.
App.js
import React, { useState } from "react";

import "./styles.css";

function App() {

  const list = [
    "Banana",
    "Apple",
    "Orange",
    "Mango",
    "Pineapple",
    "Watermelon"
  ];

  const [filterList, setFilterList] = useState(list);

  const handleSearch = (event) => {

    if (event.target.value === "") {
      setFilterList(list);
      return;
    }
    const filteredValues = list.filter(
      (item) =>
        item.toLowerCase().indexOf(event.target.value.toLowerCase()) !== -1
    );
    setFilterList(filteredValues);
  };
  return (
    <div className="app">
      <div>
        Search: <input name="query" type="text" onChange={handleSearch} />
      </div>
      {filterList &&
        filterList.map((item, index) => (
          <div key={index}>{item}</div> //Display each item
        ))}
    </div>
  );
}

export default App;
Style.css
.app {
  font-family: sans-serif;
  display: flex;
  align-items: center;
  justify-content: center;
  flex-direction: column;
  gap: 20px;
  height: 100vh;
  font-family: Cambria, Cochin, Georgia, Times, "Times New Roman", serif;
}
2. Simple counter exercise
Creating a simple counter using React which increments or decrements count dynamically on-screen as the user clicks on the button. This exercise requires knowledge of fundamental React concepts such as State, Component, etc.
We can complete the simple counter exercise with the following steps:
- Create React state to store the count value.
- Declare JS functions to incement or decrement the value through setState().
- Add HTML buttons with onClick to JSX code.

3. Display a list in React
React code to print each item from the list on the page using Array.map() function to display each item on the page.
The list of items is displayed using React JS through the following steps:
- Declare list of items as JS Array.
- Access each item using Array.map()
- Return JSX code in callback function for every item.

4. Build Accordion in React
Creating an accordion that toggles text content on click of the accordion header using React State and conditional rendering.
The following are the steps to create an accordion in React JS:
- Display every title of accordion with body.
- Hide every accordion body using element.display = none;
- Toggle visibility of accordion body on click of title.

5. Image Slider using React JS
React exercise to create an image slide, where users can view multiple images with next/previous buttons. Additionally, there is also an option to select an image from any index of the list through a click-on option circle.
The following are the steps to create an image slider in React JS:
- Declare array of objects with id and image url.
- For pre/next functionality, we decrement/increment count of the index of active image.
- Update active image index with clicked option.

6. Create a Checklist in React
React code to display a checklist with multiple options that can select and the selected options are dynamically displayed on the screen. React State is used to keep track of checked options and onChange() Event handler is triggered to alter the state whenever an option is checked or unchecked.
The following are the steps to create a Checklist in React JS:
- Create React state to track checkbox value.
- Function to update checkbox value based on event.target.checked
- Add checkbox input element to JSX code with onChange function.

7. Simple Login form in React
React code for simple login form where the user login by entering their username and password. The form inputs are validated to check if correct information is entered and the error messages are the validation fails. The login form is hidden and the “Welcome, ${name}” message is shown when the user login is successful.
The following are the steps to create a simple login form using React JS:
- Create name, email and password input form elements.
- React States to store user input values.
- Add form validation for compare name, email and password with correct values.
- Display “Welcome, ${name}” if login is successful, else display the error message.

8. Print data from REST API
React code to collect data from rest API using fetch() in JavaScript combined with useEffect() to load the content on page render.
The following are the steps to print data from REST API in React JS:
- Create React state to store the API response.
- Declare State to Component JSX code to display the API response.
- JS function where API call is through axios.get() or fetch().
- Add callback function to update the React state with API response.
- Add HTML button with JS function with onChange attribute.

9. Multi-Page navigation using React Router
React code to develop a multipage application with navigation for Home, About and Blog pages. The route-based component rendering is implemented using the “react-dom” npm package to allow users to navigate to different pages and render the component with respect to the route.
The following are the steps to Navigation with React Router in React JS:
- Add “react-router-dom” npm package to package.json .
- Specify the path for every component.
- Enclose the routes with <Router> and <Switch> in App.js

10. Context API in React Components
Context allows values to be passed from multiple levels of child components without using props. Thus context can be used as an alternative to Redux in some of the cases. Learn more about the context in React from reactjs.org/docs/context.html.
The following are the steps to use Context API using React JS:
- Create React context using React.createContext().
- Declare context object with properties and values.
- Wrap App.js with <AppContext.Provider> </AppContext.Provider> with values as context object.
- Access context object through components using React.useContext().

React Beginner Tutorial


